


1957 Imperial Good Companion 4 #4c 286
Status: My Collection
Hunter: Saul Bryan (Saulysw)
Created: 09-24-2021 at 11:35PM
Last Edit: 11-19-2022 at 05:10AM

Description:
There is a bit of a story behind this machine, which takes a while to tell, but before doing that, perhaps a quick "executive summary" for those not interested in the finer details. The machine is fairly beat up but types well, as long as you don't try and use any of the fractions - they pull each other up and jam up together. The machine has been restored and modified, and is no longer "original" completely, although most of this is hidden. It is missing the end bolt on the paper bail, which means it can't be kept at the right tightness to make it sit right on the platen. The fiberglass case is damaged but functional. I like it.
OK, now I want to go into some more details. I bought this from a very nice lady in Sydney, Australia, who had had it in her family for decades, I think she said since new or near enough. However, it had been in the carry case for decades as simply a decorative piece as it was not functioning. The main and immediate issue was that the paper path was blocked by degraded feed rollers on the underside of the platen. Some of them were in a very bad way, almost melted on the metal. In what turned out to be the biggest repair project of any typewriter so far, I replaced these rollers with automotive pressure hose. This was difficult to source, the first place I went to had some but it was low-grade and the hole in the middle was very off center. The next place had USA made hose, and to my eye it appeared to be exactly the right size. It was a snug fit and with some oil to and working it I was able to put the new hose on the rollers. When I replaced them back into the machine I noticed that they were just a fraction larger than the original, and this started a chain of modifications to enable the machine to still function while continuing to have these new rollers. I had to resize the hole for the rollers with a dremel. There were two sets of rollers, and they both required some metal removed to fit.
Then putting the platen back together was its own saga. The left hand side of the carriage return mechanism is spring loaded and comes apart by itself when you take the platen off. It is difficult to hold the parts together, squeeze them into place, then thread the rod into the roller on the other side. You have to also have the end of the spring hooked to the right part of the frame before you start. It helps if you have about 4 or 5 hands. Pro tip : take lots of macro photos before attempting this as you WILL forget how it all goes together. I did this and still had a lot of issues, but finally, and with a great sense of relief, I got it back together again. Paper fed in!
That's when I discovered the the new larger rollers were catching on various parts of the mechanism as the carriage moved left to right. Again, I used the dremel to grind down metal that was poking out here and there until it all passed through without contact. Fortunately there was nothing functionally important I was modifying, although I got quite close to the hook part of a spring. In the end it worked well and the paper would feed, grip and still release when the lever was pushed.
In addition to this (for me) big job, I have done a fair bit of other work on this machine. I re-formed the A key, which was off. I adjusted the paper bail, although it is still not perfect. I fixed the upper/lower case alignment, which is done with bolts under the carriage rails. I replaced the rear feet with modern ones, as the original feet were too far gone - smooshed, cracked and falling apart. Not being able to get the same style of robber feet, I had to screw the replacements directly into the frame, again, not the most elegant solution but this machine is all about getting working rather than keeping it strictly original at this point. I also replaced a small spring that enabled the caps-lock to work again, which doesn't sound like much but made me very happy. The machine has been cleaned constantly too, and is considerably nicer than when I got it, inside and out.
The case needed a lot of work too, and still does. I cleaned it and gave it a light coat of dubbins brown wax, which hid the white scratches. The fiberglass is damaged in the back and I have the broken off piece, perhaps one day I'll fix that. Then I replaced the rubber feet on this with modern flatter ones that fit into the holes. They are not as tall as the originals, so in a way they don't function well to lift the base off the surface, but I always remove the typewriter from the base when using it anyway so that is somewhat of a moot point.
Overall I've tinkered with this machine for a fairly long time, and it is now typing really quite well, and I'm happy with where it is at now, although there is still more to be done. The touch is somewhat unusual in my collection, it is heavy initially but then the keys get a satisfying velocity going so that by the time they strike they are really moving. For a machine that when I got it could hardly type a few words, it now flies. One design feature I really like is how easy it is to see all of your typed page and even the current line, it is all there in front of you. I don't know how rare the grey key variants of this machine are, but this appears to be the first example with these in the database at the time of writing.
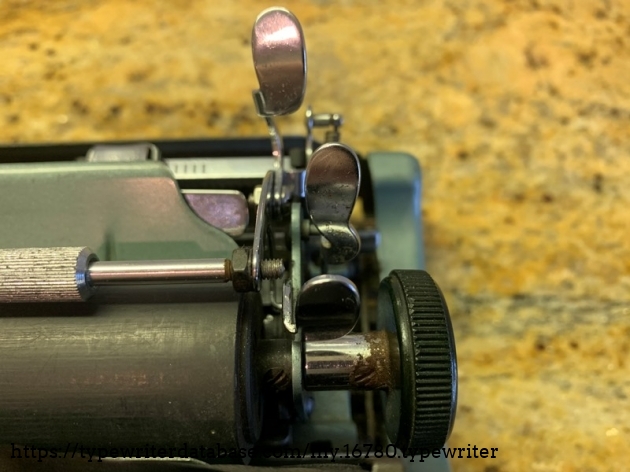
Edit 2022-11 : A friend has made from spare parts a replacement ribbon reverse knob. I have also found a replacement paper bail nut with the right threading to fix that. I still like using this machine, it has a little bit of a stiff keystroke feel at first but you get used to it quickly and then really start to groove to it.
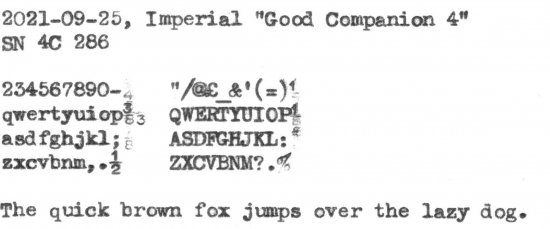
Typeface Specimen:
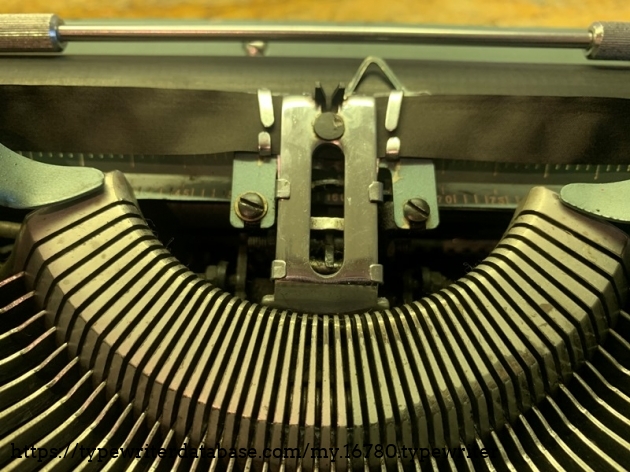
Photos:


Hunter: Saul Bryan (Saulysw)
Saul Bryan's Typewriter Galleries [ My Collection ] [ My Sightings ]

Status: Typewriter Hunter
Points: 561
I live in Sydney, Australia. I've been collecting typewriters since about October 2020.
RESEARCH NOTE: When researching the Imperial Good Companion 4 on a computer with lots of screen real estate, you may find that launching the Imperial Serial Number page and the Imperial Good Companion 4 By Model/Year/Serial page in new browser windows can give you interesting perspectives on changes throughout the model series.